sam-b.github.io
Binary diffing with kam1n0
This is just a quick post to give an example of using Kam1n0 which is a binary diffing tool that I’ve been using a lot recently while looking into Windows kernel vulnerabilities. Often when looking at vulnerabilities which have now been patched there is very little information available, for example just the function which the issue occurred in or in worse cases only the sub-system is named. One way in which to get more information about these issues is to look at what changes were made when they were fixed, this can often make it obvious what the root cause was. In this post I’ll walk through looking at the changes made to fix CVE-2014-4113, an unvalidated pointer issue that existed in win32k (and I wrote an exploit for this issue which can be found here). You’ll need IDA installed if you want to follow along with this.
Installing Kam1n0
Kam1n0 is a tool designed to carry out searches for ‘cloned’ assembly code across a large number of binaries created by the Data-Mining and Security lab at McGill University, the project page is on Github: https://github.com/McGill-DMaS/Kam1n0-Plugin-IDA-Pro . Luckily the project also makes a standalone diffing engine available which is bundled with an IDA Pro plugin which utilises IDAs disassembler to give the engine data. You can download the standalone engine and plugin from the releases page https://github.com/McGill-DMaS/Kam1n0-Plugin-IDA-Pro/releases. The Github repository includes good documentation so I’m only going to briefly cover installing the tool.
Once you’ve downloaded the latest release zip file you should be able extract it and then run the ‘Kam1n0WinSetupProject’ executable. Click through the dialogs, accept the license and then on the install location screen browse to the plugins directory inside of the directory you have IDA installed in (for me this was ‘C:\Program Files (x86)\IDA 6.8\plugins'). Next I left the feature selection as is since it defaults to installing all of Kam1n0’s features and then I left the indexed data directory as its default value which is ‘C:\ProgramData\Kam1n0-data' but it’s worth changing this to a location that the process will be able to write to without being run as Admin. Once the installers completed you should have a ‘Kam1n0’ shortcut on your desktop.
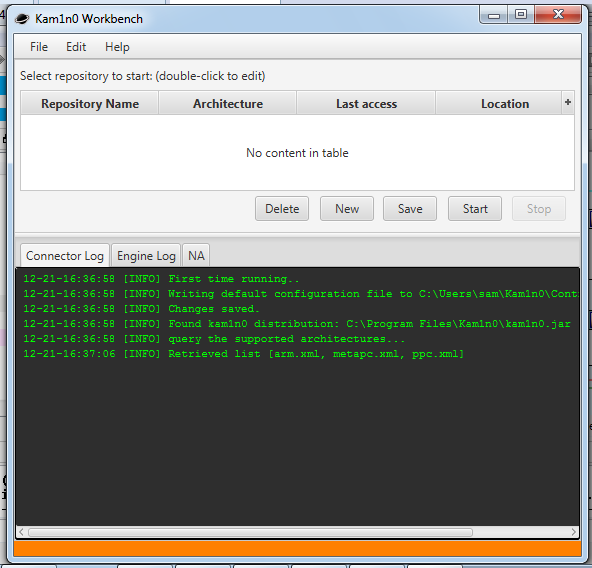
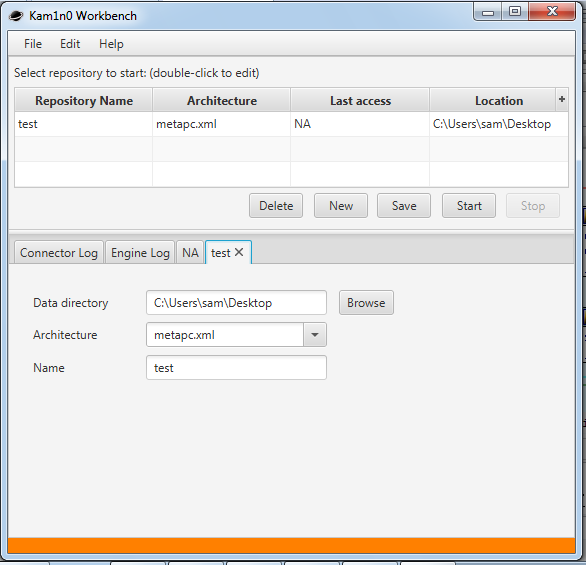
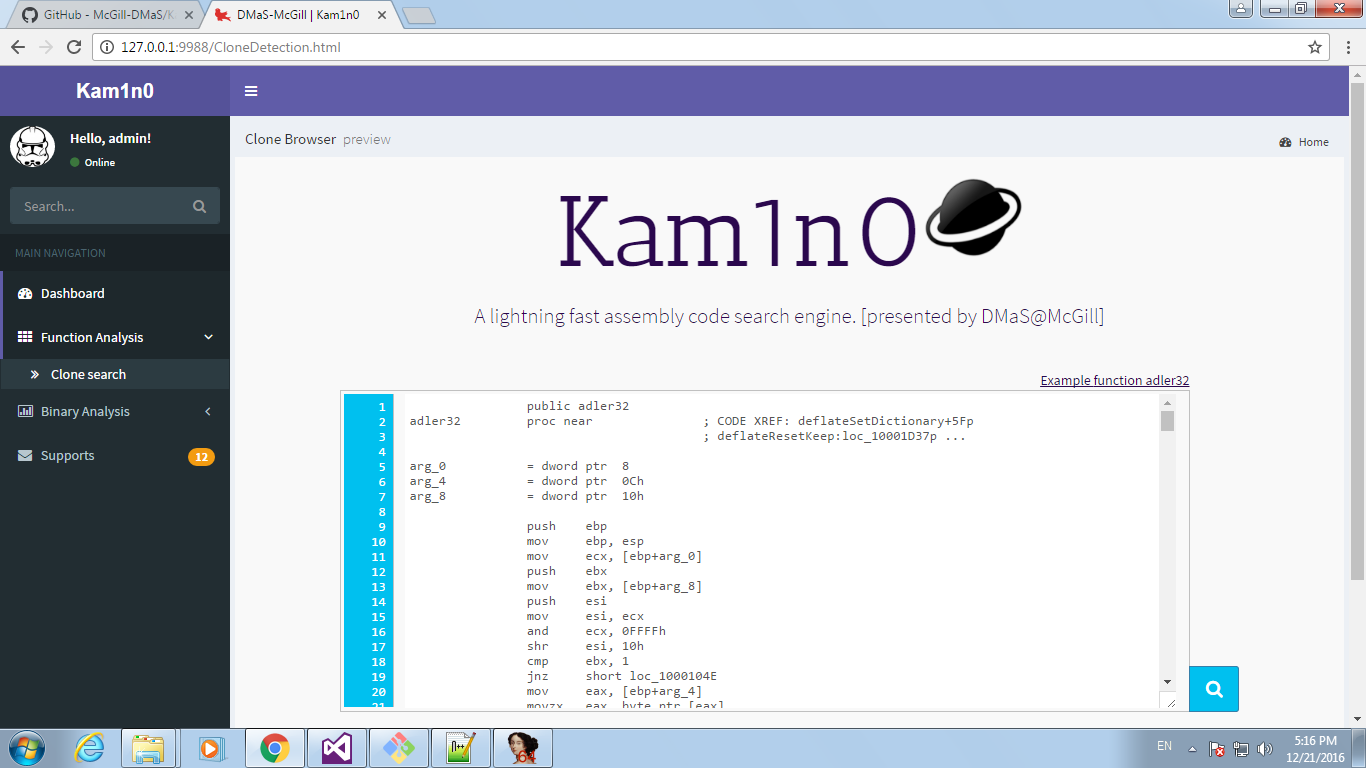
Once it’s started you can open http://localhost:9988/ in your browser. Login using the default credentials ‘admin’:’admin’ and you should see the very shiny management interface.
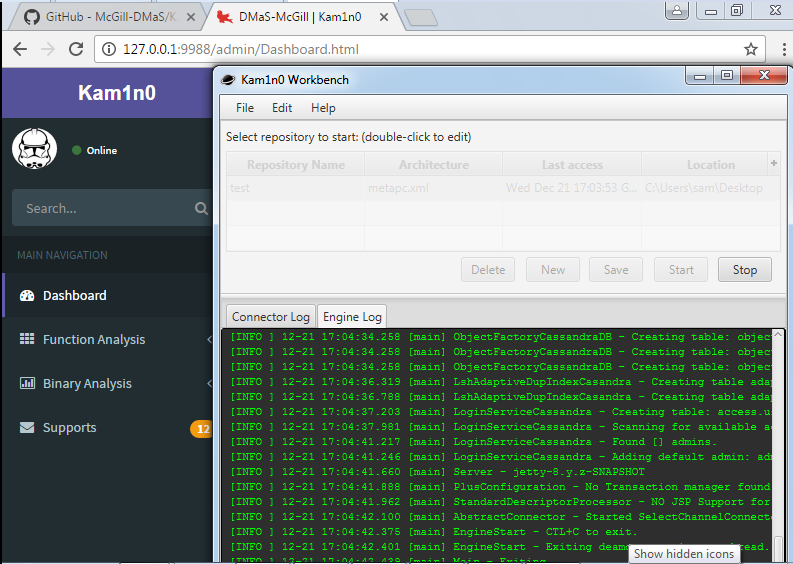
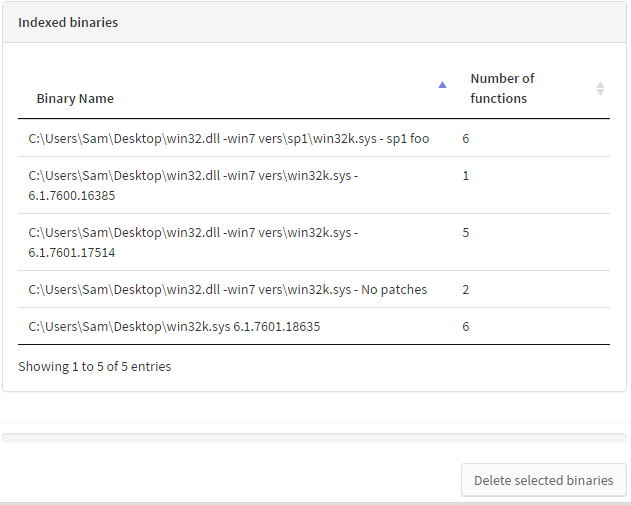
you won’t be using this very often as 99% of the time you can do everything you need using the IDA Plugin but one key thing that’s part of this interface is the ‘Indexed Binaries’ panel which shows what binaries are indexed and lets you remove them from the index by selecting them and then clicking on ‘Delete selected binaries’.
Diffing our targets
Now that Kam1n0 is running we want to open our baseline binary in IDA, for this I used a copy of ‘win32k.sys’ from a completely unpatched Windows 7 ISO. You should notice a bunch of new buttons have appeared in IDA:
 Now we want to add our target function to Kam1n0’s index, the issue we are looking at occurs inside the ‘xxxHandleMenuMessages’ function so we can quick filter the function list on this name and then right click on it.
 Clicking on ‘Index selected function’ will add it to the index. Next I repeated this process with a copy of win32k.sys taken from a Windows 7 VM downloaded from https://dev.windows.com/en-us/microsoft-edge/tools/vms/windows/, again filtering for the right function and then indexing it. Now right click the function again and click on ‘Select functions to search’, this will cause a pop-up to appear and once the search has completed a new window will open. As I already had several versions of win32k indexed this shows more then two functions but this window is called the ‘Clone graph view’ and shows functions which have shared code with the function we just searched for.
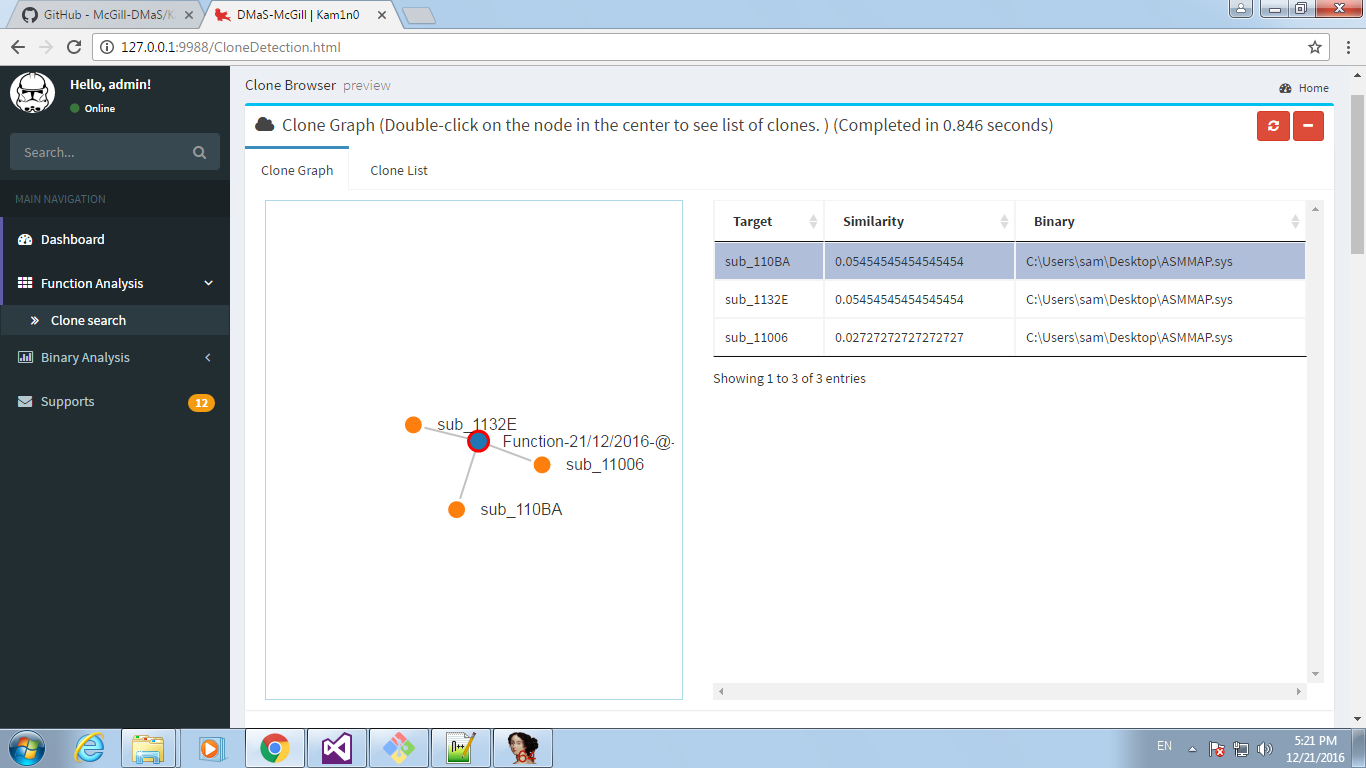
 Double clicking on the central node will make another window open.
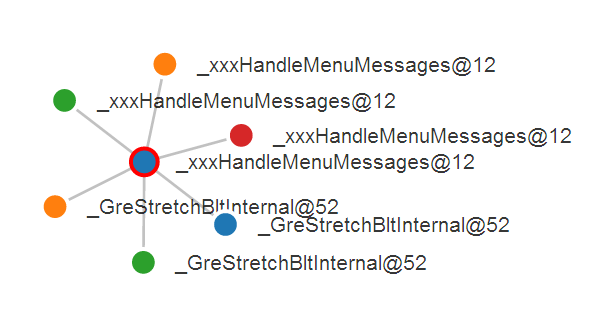
 This shows that I have 3 versions of xxxHandleMenuMessages indexed which are identical and one which is significantly different, it’s safe to say this is the latest version of win32k which has had the vulnerability patched. We can also see that the function has a small amount of code in common with GreStretchBltInternal, another previously vulnerable function I’ve looked at. Selecting ‘text-diff’ on one of the unpatched version gives us a side by side comparison of the two function versions.
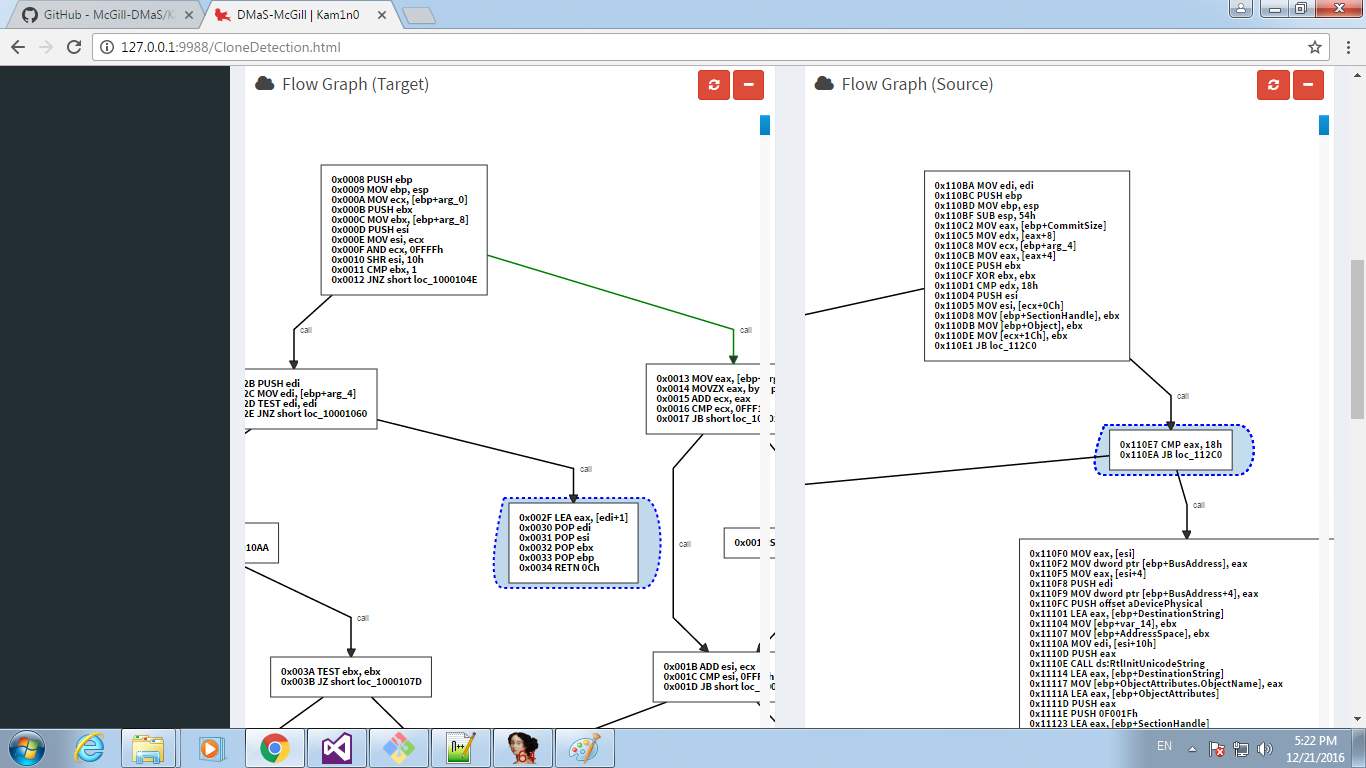
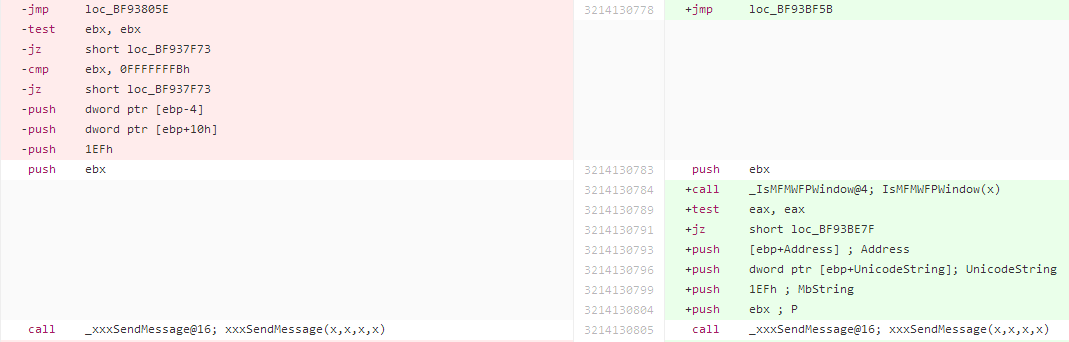 Scrolling down it’s easy to see the biggest change is where a bunch of code has been removed and replaced with a call to IsMFMWFPWindow which properly validates the previously incorrectly validated pointer, which is then passed to xxxSendMessage which then dereferences the pointer and could be exploited if an invalid value is passed. We can also click on ‘flow diff’ from the comparison window which shows us two side by side control flow graphs with their differences highlighted, below we can see how the validation changes have affected the control flow of the function.
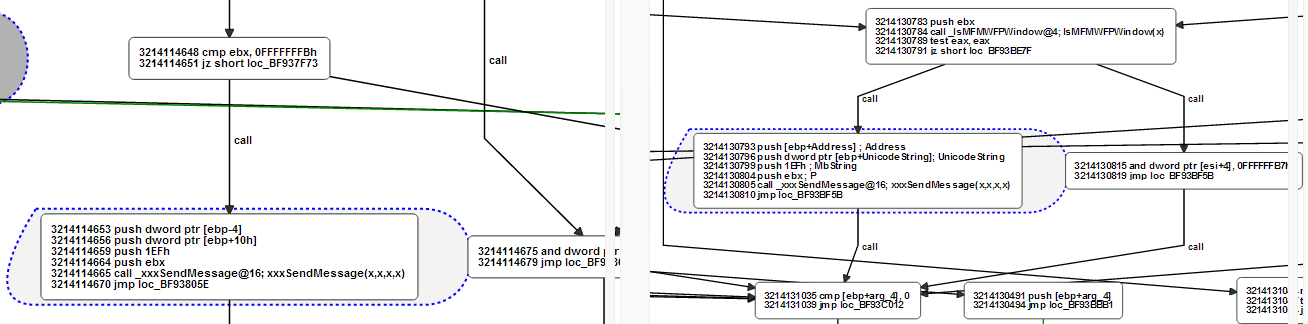 This view is pretty call and you can click and drag to move around the view and scrolling will zoom in and out, the two views move independently.
In the latest release of Kam1n0 they’ve started making more use of the web interface
Other tools
There are a bunch of other IDA plugins which provide binary diffing which could have been used for this, a few examples are:
- Diaphora: https://github.com/joxeankoret/diaphora (Free and Open Source)
- BinDiff: http://www.zynamics.com/bindiff.html (Commercial)
- TurboDiff: http://www.coresecurity.com/corelabs-research/open-source-tools/turbodiff (Free and Open Source)
There is also the radiff tool which is part of the Radare2 binary analysis toolkit - http://radare.today/posts/binary-diffing/